Beekeeping 101: A Complete Step-by-Step Guide for Absolute Beginners
Bees, bees, bees. Sounds familiar? Well if you’re reading this, you’re probably thinking about jumping into the wonderful world of beekeeping. And let me tell you – it’s a journey worth taking! Starting in the spring of 2018, our decision to enter into the world of beekeeping was haphazard at best. Ordering a hive online is easy. Opening the box when it arrives is easy. But what comes after? That’s where things get interesting. Enjoy this article on beekeeping 101.
I remember staring at that first FLOW hive box thinking, “Now what?” No instructions. Just me, a box of wooden parts, and a dream of helping pollinators (and maybe getting some honey too). The learning curve? Steep doesn’t begin to describe it. But hey, several years later, I’m still at it and loving every minute… well, almost every minute.
So you want to be a beekeeper? Let’s break it down into manageable steps so you don’t make the same mistakes I did.
Step 1: Learn About Bees BEFORE You Buy Anything
I cannot stress this enough. My first mistake was ordering equipment before understanding what I was getting into. Don’t do that.
Take some time to understand the basics of bee biology and behavior. What’s a worker bee? What does the queen actually do? How do bees communicate? What’s the difference between brood and honey? These fundamentals will make everything else make sense.
Resources to start with:
- Beekeeping books (I started with “Beekeeping for Dummies” – no shame)
- YouTube videos on basic hive inspections
- Online courses (many local extension offices offer them)
- Local beekeeping association meetings
Spend at least a month just learning before you spend a dime on equipment. Trust me on this one.
Step 2: Find a Mentor or Take a Class
Remember my story about assembling that first hive? 6.5 hours of frustration that could have been avoided if I’d connected with experienced beekeepers first.
Local beekeeping associations are GOLD. Most areas have them, and they’re usually filled with friendly folks eager to help newcomers. Many offer beginner classes, and some even have mentor programs where you can shadow an experienced beekeeper.
I took a “First Year Beekeeping” course provided by UNL and it was a game-changer. Suddenly, all those random YouTube videos started making sense in a structured way.
No local association? Look online for virtual classes or reach out to beekeepers on social media. Most of us love talking about our bees.
Step 3: Choose Your Equipment Wisely
Now we’re getting to the fun part, but also where you can waste a lot of money if you’re not careful.
First, decide on the type of hive you want. The most common are:
- Langstroth (most popular in North America, vertical boxes)
- Top Bar (horizontal, single-level hive)
- Warre (similar to Langstroth but with some differences)
- FLOW (the newfangled option I started with, which has pros and cons)
For beginners, I generally recommend a standard Langstroth setup. It’s what most resources are based on, equipment is readily available, and most mentors use them.
Basic equipment you’ll need:
- Hive boxes and frames
- Bottom board
- Inner and outer covers
- Protective gear (suit, veil, gloves)
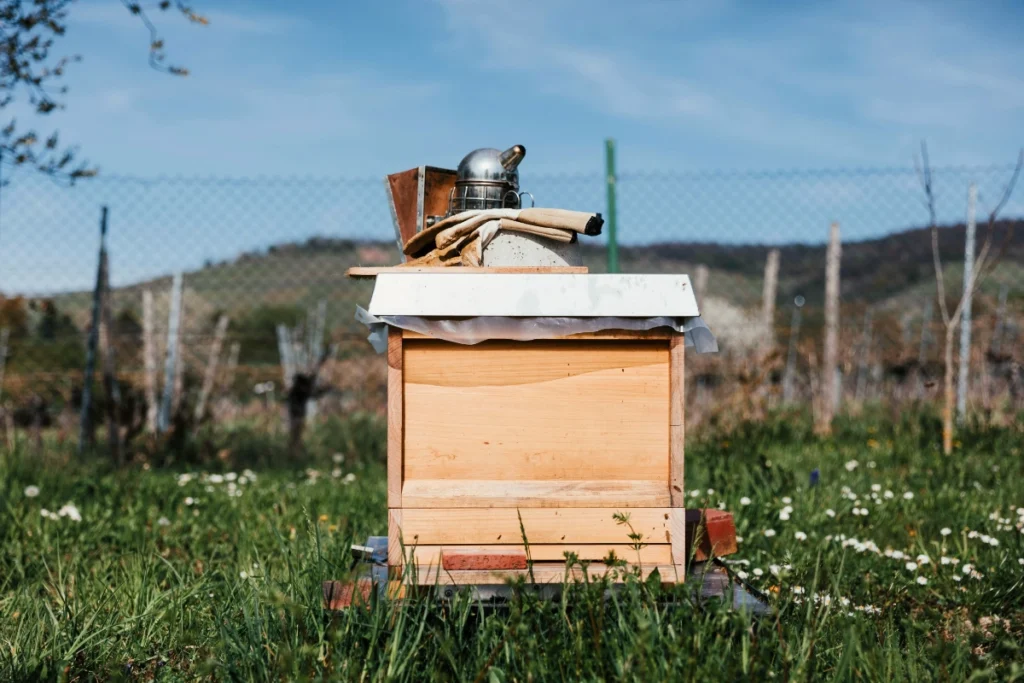
- Hive tool and smoker
- Bee brush
Don’t go crazy buying every gadget out there. Start simple and add as you learn what you actually need.
Oh, and about those beautiful cedar hives? They look and smell amazing, but you’ll need to paint them to protect the wood. I learned that one the hard way too. Light colors are best (helps keep the hive cooler). I went with oil-based metallic silver chain link fence paint for my hives, but there are lots of options.
Step 4: Plan Your Bee Yard
Before your bees arrive, you need to figure out where they’re going to live. This is more important than most new beekeepers realize.
Ideal bee yard characteristics:
- Morning sun, afternoon shade if possible
- Protection from strong winds
- Easy access for you (you’ll be visiting frequently)
- Away from high traffic areas (both human and animal)
- Relatively level ground
- Access to water (bees need water, especially in summer)
For my yard, I went all out with wildflower plantings – Wildflower Aromatic Mix, Wildflower Pollinator Mix, Wildflower Butterfly and Songbird Mix, Wildflower Bouquet Mix, and Wildflower Butterfly and Hummingbird Mix. Did I need all of those? Probably not, but the bees certainly appreciated the buffet!
Remember, bees will forage up to 3 miles from their hive, so don’t stress if your immediate area isn’t flowering paradise.
Step 5: Getting Your Bees
There are several ways to acquire bees:
- Package bees (3 pounds of bees plus a queen in a screened box)
- Nucleus colony (or “nuc” – a mini established colony)
- Swarm capture (free but requires skill and timing)
- Full established hive (usually from another beekeeper)
For beginners, packages or nucs are the way to go. Packages are usually cheaper but take longer to establish. Nucs give you a head start with drawn comb and established brood.
I started with packages, and let me tell you – picking up packages of LIVE BEES is an adventure! There I was, driving home with thousands of buzzing insects in my car, wondering if this was really a good idea. The fear was real, but the excitement was greater.
Pro tip: Have your hive 100% ready before your bees arrive. The day you get your bees is NOT the day to finish assembling equipment.
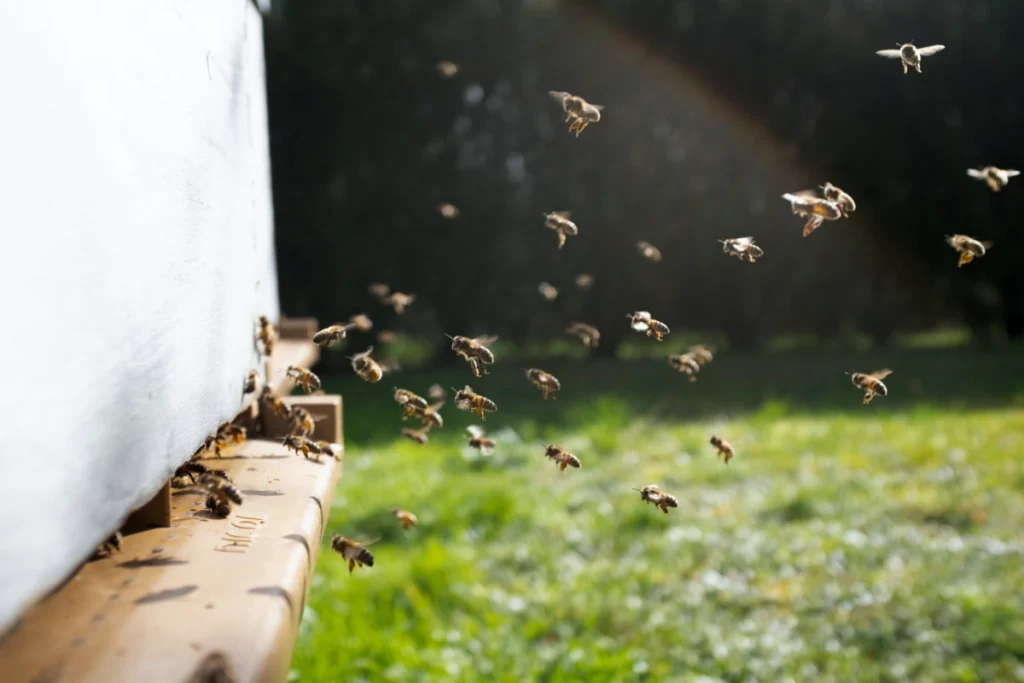
Step 6: The First Few Weeks
Once your bees are installed in their new home, the real beekeeping begins. Here’s what to expect:
First Week:
- Feed, feed, feed! Sugar syrup (1:1 ratio of sugar to water) is essential until they have enough forage.
- Leave them alone for a few days to get oriented.
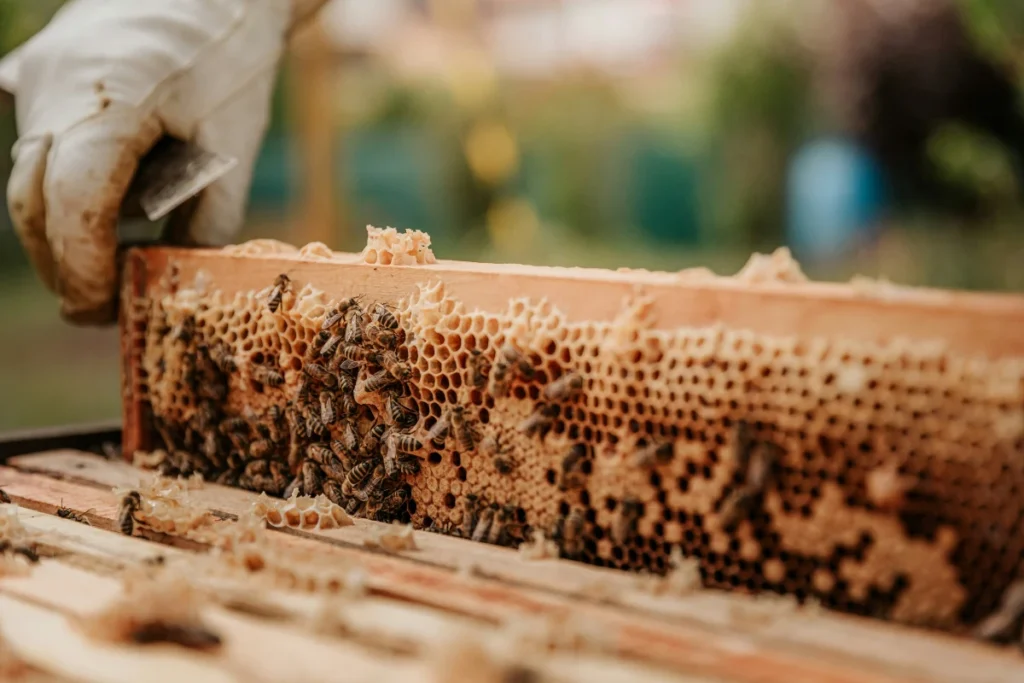
- Do a quick check to make sure the queen is released (if she came in a cage).
First Month:
- Check for eggs and larvae (proof your queen is laying).
- Continue feeding if needed.
- Don’t disturb them too often, but monitor for progress.
I remember my first hive check post-installation. I was sweating bullets (partly from the bee suit, partly from nerves). But seeing those first eggs and tiny larvae was magical. That’s when it hit me – I’m really doing this!
Step 7: Seasonal Management
Beekeeping follows the seasons, and your management should too:
Spring:
- Build-up time for the colony
- Add boxes as needed
- Monitor for swarm signs
Summer:
- Continue adding space
- Monitor for pests (especially varroa mites)
- Possible honey harvest (though maybe not in year one)
Fall:
- Prepare for winter
- Treat for mites if needed
- Ensure adequate honey stores
Winter:
- Minimal management
- Occasional checks on food stores
- Planning for next season
Step 8: Join the Community
The beekeeping community is one of the most supportive out there. Don’t try to go it alone.
- Attend local meetings
- Join online forums
- Follow beekeeping blogs and social media accounts
- Consider participating in citizen science projects
The collective knowledge is invaluable, and the friendships you’ll form are even better.
Common First-Year Mistakes (I’ve Made Them All!)
- Opening the hive too often (disturbs the bees)
- Not feeding enough in the beginning
- Adding too much space too quickly
- Panicking at the first sign of trouble
- Not treating for mites when needed
- Harvesting too much honey the first year
Remember, first-year beekeeping is about establishing strong colonies, not maximizing honey production. Give your bees time to build up before expecting a big harvest.
Taking Flight as a New Beekeeper
Starting with bees is a mix of excitement, fear, confusion, and wonder. That first sting? You’ll remember it. That first frame of capped honey? You’ll never forget it.
Beekeeping reconnects you with nature in a way few other hobbies can. You’ll start noticing flowering patterns, weather effects, and insect behaviors you never saw before. It’s like putting on a pair of nature glasses that make the world more vibrant.
The road won’t always be smooth. You’ll lose colonies despite your best efforts. You will get conflicting advice. Mistakes will be made. But each season brings new knowledge and deeper connection.
If you’re on the fence about starting, my advice is simple: Go for it. The bees need more allies, and the learning experience is worth every sting.
Got questions about getting started? Need more specific advice? BEESPLZ is here to help. Share with us your availability and interests, and we can help accommodate your participation in this wildly interesting, growing in popularity, and important activity in our world today.
Because the world as we know it would not exist if it were not for the bees.